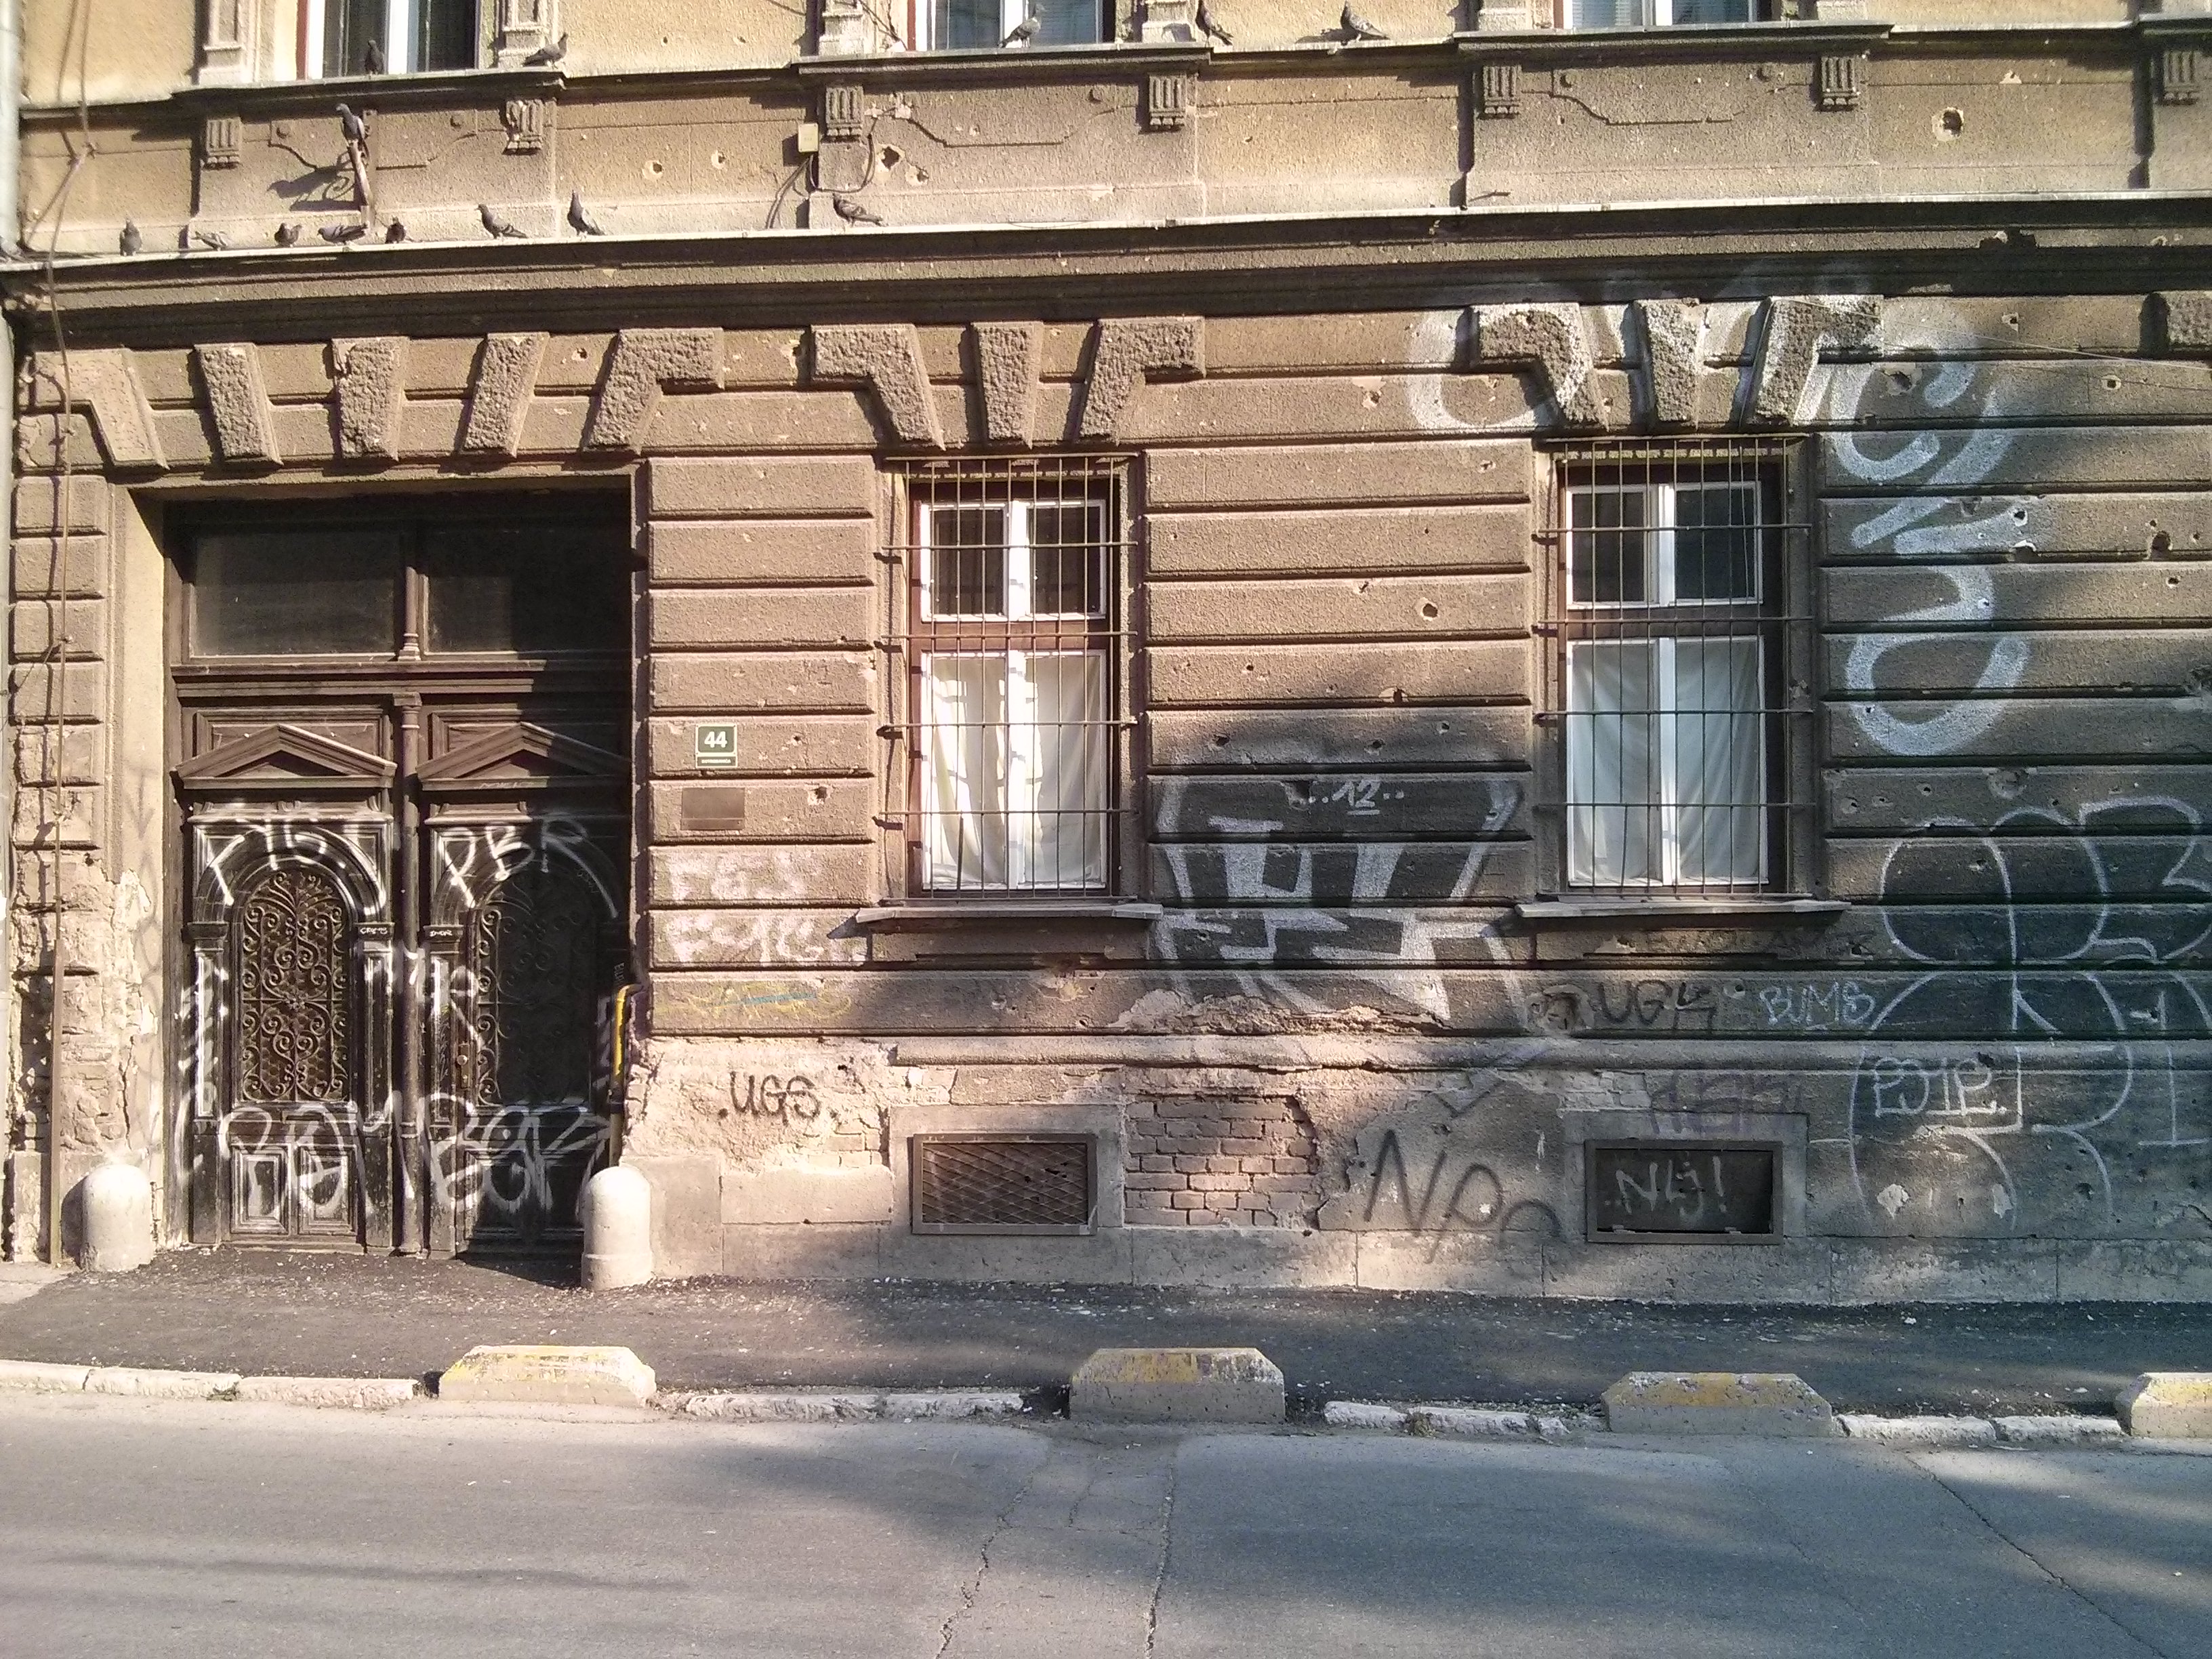
 Profitant de notre chambre à trois, nous avons fait une grasse matinée bien méritée avant de nous mettre en branle pour la journée. Encore une fois, j’ai réussi à me négocier une petite période d’écriture avant de partir pour la visite. Le temps était grisâtre, mais l’air frais, contrairement aux chaleurs cuisantes des dernières semaines. Premier arrêt, la cathédrale de Belgrade. Impressionnante de l’extérieur, décevante de l’intérieur car encore en construction (débutée en 1989). Par la suite, deux bâtiments bombardés par l’OTAN en 1999 en représailles du Kosovo et laissés en ruine.
Nous nous sommes pas mal questionné sur la raison pour laquelle les Serbes conservaient de tels fantômes dans leur paysage urbain. Non seulement les bâtiments étaient présents, mais des travaux d’ingénierie avaient étés effectués afin de stabiliser la structure. Deux théories nous sont venues à l’esprit. En bombardant la capitale, l’OTAN a causé à ce qu’il paraît plus de 400 morts dans la population civile. Donc, il se peut que ces vestiges soient gardés pour rappeler à l’ouest sa lâcheté. D’un autre côté, ce n’est pas comme si le gouvernement Yougoslave de l’époque n’avait pas purement et simplement sérieusement foutu la merde dans tous les pays l’entourant, donc c’est aussi possible que ces ruines soient conservées comme rappel d’un passé belliqueux.
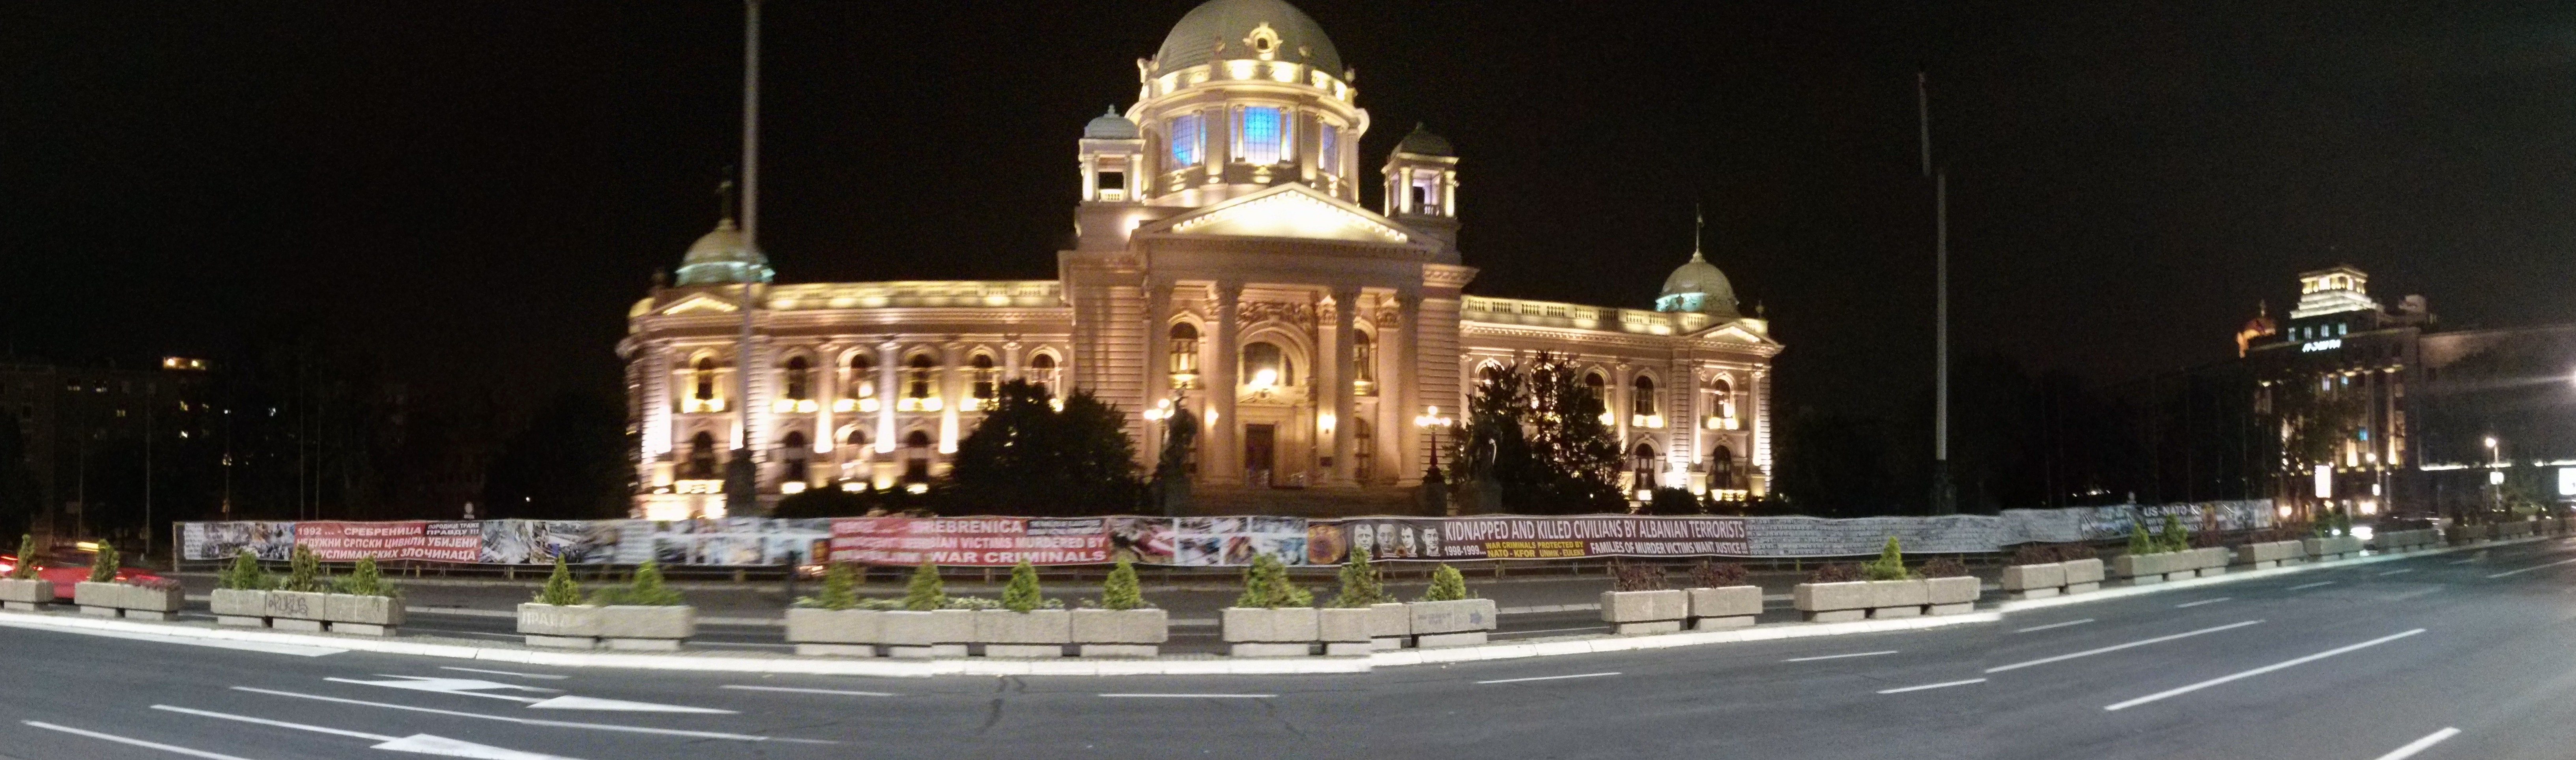
Je donnais au début du crédit aux deux hypothèses, mais plus la journée s’est avancée, plus j’ai penché vers la première. À en juger par certains graffitis dans la ville, les Serbes portent encore bien sur le coeur l’intervention de l’OTAN. Bien plus tard, alors que nous rentions à l’auberge, nous avons remarqués en passant devant le parlement de nombreuses banderoles clament haut et fort les crimes de guerre des Kosovars et des Albanais. Rien de noir et blanc en ce bas monde…
Après avoir observé ces vestiges de bombardement et fait quelques autres arrêts, nous avons poursuivi notre excursion vers le nord de la ville, en fait une péninsule en forme de promontoire occupé depuis des siècles par un fort. Le coup d’oeil sur le Danube en valait la peine à mon avis. Si bien que j’ai insisté pour que nous descendions et nous nous rendions à ses berges pour l’observer de plus prêt. J’ai dû trainer un peu mes compatriotes, mais ce faisant, nous avons pu traverser un intéressant quartier de blocs communistes, celui-là beaucoup plus vivant qu’à Sarajevo.

S’orienter dans la ville s’est avéré être un petit défi. Non seulement, il semble que j’ai d’emblée mal saisi la disposition des choses, mais sur le terrain, les noms de rues, lorsque présents, étaient surtout écrits en alphabet cyrillique (comme beaucoup d’autres choses). En fait, le Serbe, le Croate et le Bosniaque sont toutes la même langues avec seulement quelques petites variations dialectiques. Cependant, le Serbe s’écrit officiellement en cyrillique tandis que les autres sont en latin. Lors de l’époque Yougoslave, des efforts d’unification de la langue avaient été entrepris, mais suite à l’éclatement de celle-ci et de la montée subséquente de sentiments nationaux, les distinctions sont redevenues d’actualité. Le Serbe par contre, tend à s’écrire de plus en plus en latin histoire de simplifier la communication avec ses voisins.
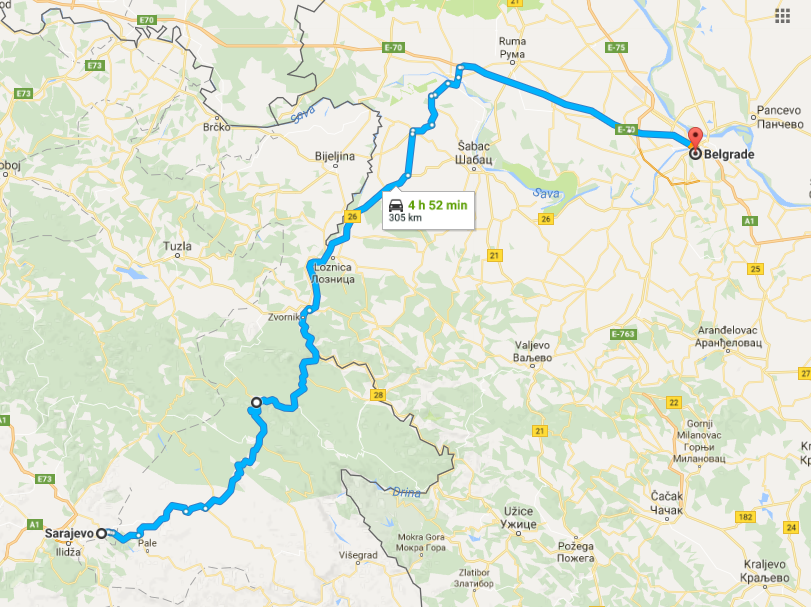
Finalement, après avoir passé (encore) beaucoup trop de temps à choisir un restaurant. Nous avons marché dans la ville puis sommes retournés nous coucher, déçu de ne pas avoir pu passer plus de temps dans cette capitale surprenante. La mère d’Audrey nous quittait le surlendemain et ne pouvait que passer une journée à notre prochaine destination, Budapest. Ainsi, nous nous étions promis de partir très tôt afin d’en profiter au maximum.