The keyMote: a simple wireless remote for computers

The keyMote
The keyMote

Note: this post about an electronics project has been sitting as a draft since 2011 so some of its content might appear outdated. Regardless, I’ve been using the device since then so I figured I should commit it to posterity.

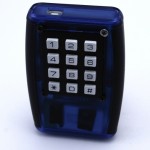
To my computer, its simply a USB keyboard, nothing less, but to me its a remote I can use on any platform with no line of sight. I decided to name it the keyMote. Sounds a bit odd to my ears but its a fitting name.

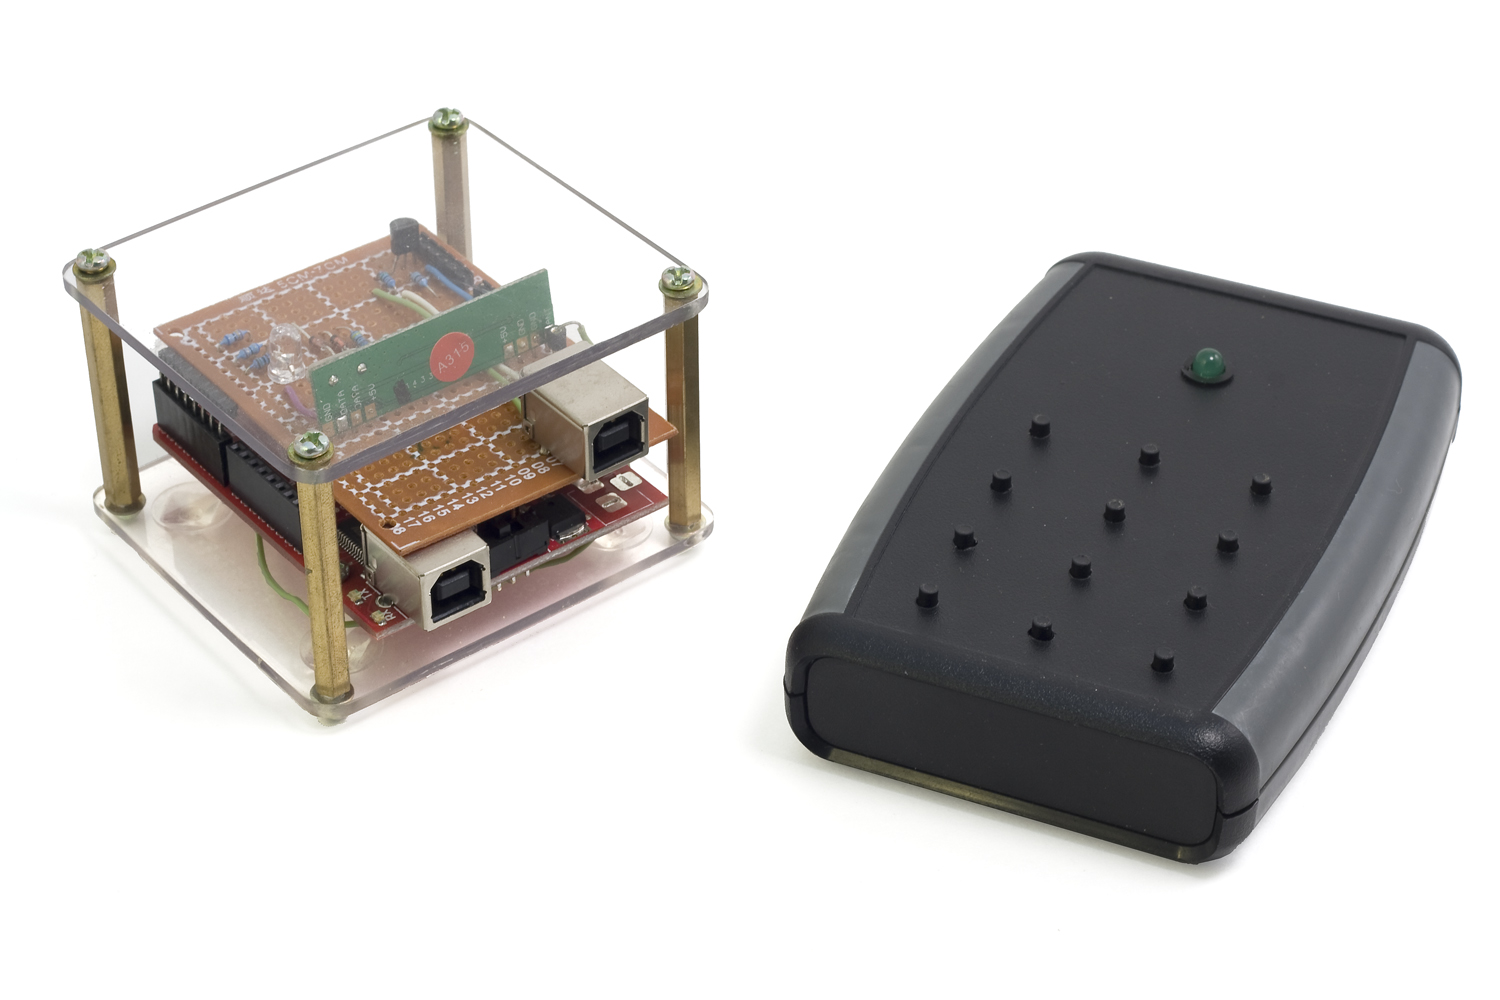
Here is how it works. There are two parts to this system, the remote, which is battery powered, and the base, which is hooked up to a computer. The remote is a simple keypad (In the case of the prototype, its a numeric keypad, but really, it could be any interface) with a transmitter hooked up to it. The base, the other end, is a receiver with USB Human interface device functionality, in other words, a vanilla USB keyboard. When a button is pressed, the remote sends the identifier of that button to the base which then looks up in a table the keystrokes this identifier is mapped to and sends those to the computer via USB. What button is mapped to what keystroke is entirely configurable using a serial terminal interface (shell) to the base. It can be anything, Ctrl-C, Alt-Shift-F, PageUp, etc. Getting it to interface with your program is then simply a matter of configuring keyboard shortcuts.

The use case

Here is the actual use case that spawned the idea. I was doing some plumbing work in my kitchen with the computer playing songs in the background. It then hit one in the playlist that I especially hate (but keep for nostalgia), but I was in no position to change it as it would have implied bending out of underneath my sink, walking to my computer and then hitting Ctrl + Shift + Right to skip to the next tune. I use Linux and at that time, the media buttons on my keyboard were not operational, I knew very few remotes would work on my platform and finally, I had no line of sight with the computer, so infrared was out of the question. Agreed, a wireless keyboard would have done the trick, but those tend to be limited in range, and well, they are still keyboards, so you have to do the key combinations yourself and are somewhat cumbersome to lug around. So I thought: Why not get something that will emulate my hands typing the keyboard shortcuts?

I looked around for possible off-the-shelf solutions, but none of them were well supported under Linux; basically they all required drivers and were proprietary and as we all know, anything with a driver is dependent on company support an will get dumped sooner of later. The keyboard idea was starting to get some traction. It was the obvious medium to go with, the USB human interface device standard has been around for a decade or so and will likely stick for a few more but more importantly, it is understood by most OSes. Failing to come across anything that would suit my purpose, I set out to develop one from scratch and after a bit of work (or a lot, depending where you come from), I had what I wanted: a simple, rugged self-contained system with no drivers attached, plenty of battery life and a way to make it type whatever I want. Currently, its mapped to my MP3 player, sound controls, Video player controls and some programming IDE functions. It could very well launch applications, toggle the visibility of certain windows (via the window manager), start scripts; it can do anything a keyboard can do.

The system

The main hardware components are an arduino, a wireless receiver and transmitter pair and another microcontroller hooked up to a battery in the remote. I started off with trying out wireless communication on the arduino IDE but soon converted to C/C++ for the added flexibility once I was past figuring out the libraries.
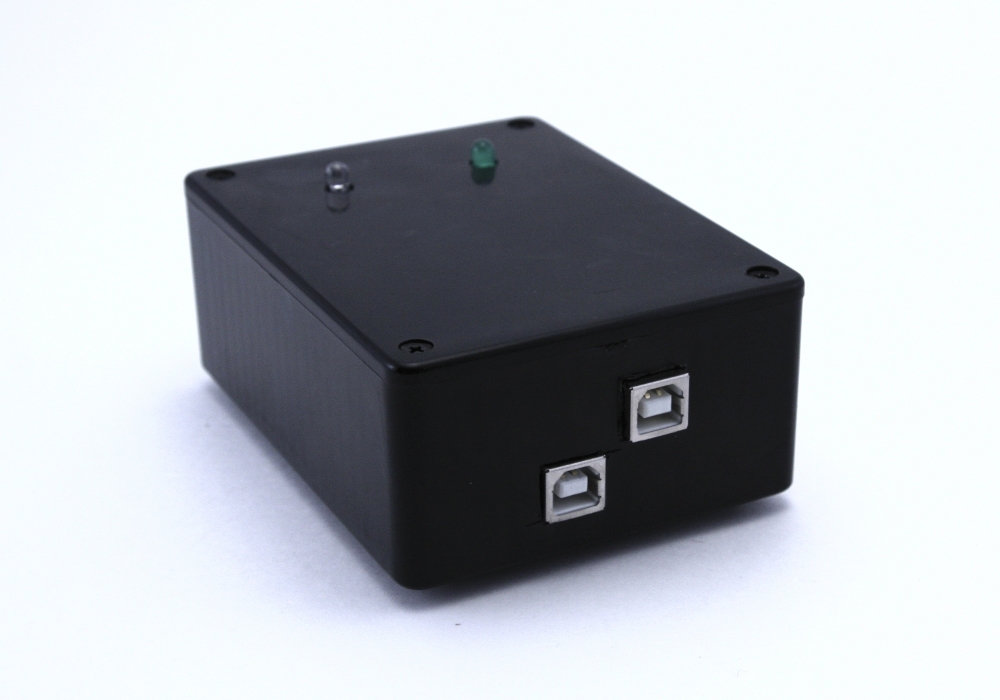
Base

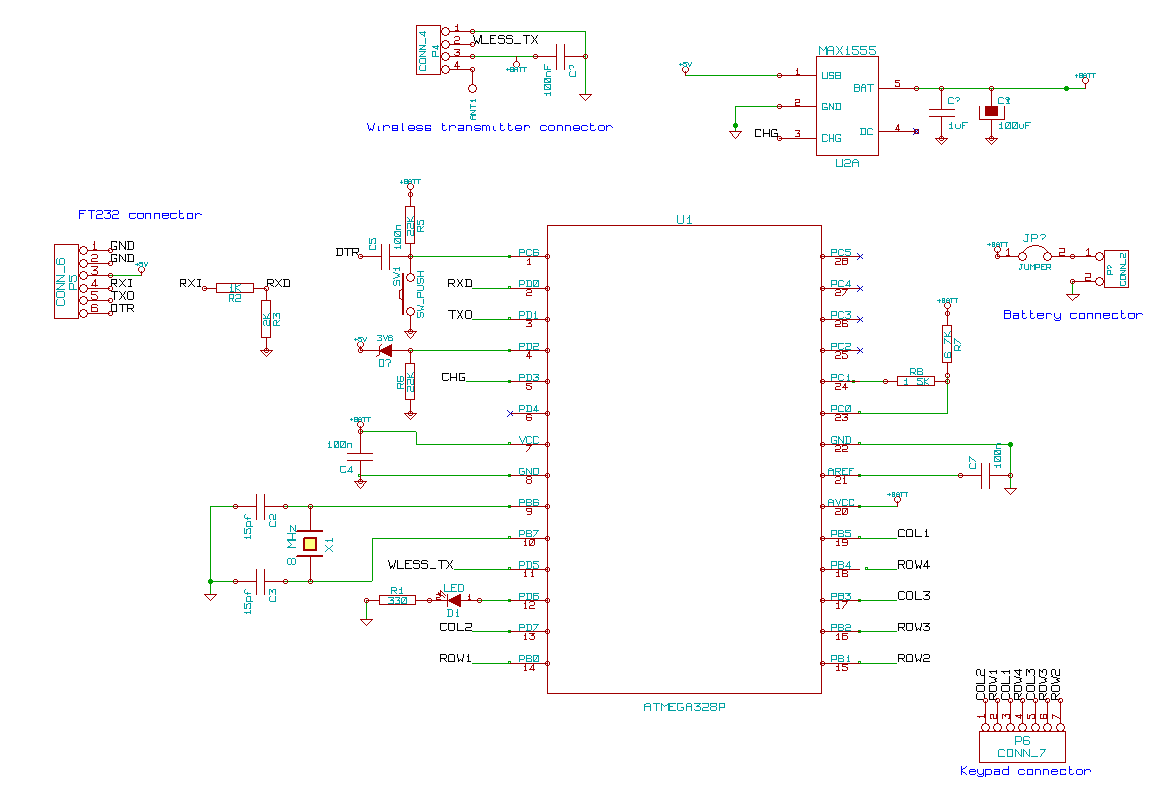
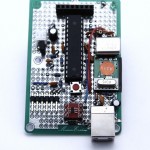
The base software is mainly an interface between two libraries, VirtualWire and V-USB along with a shell to configure the mapping between remote key codes and key strokes. VirtualWire is a library that makes exchanging bits (a lot harder than the datasheet implies, what you send on TX is quite what you get on RX) between vanilla wireless interfaces very straightforward. V-USB is a marvelous implementation of the USB protocol on the AVR using nothing but bit-banging. It’s quite limited in capacity but it’s extremely lean and makes USB accessible for anyone with the patience to understand the protocol. While the actual serial shell is a fair chunk of code, it is needed only for configuration, so this project is mainly composed of glue code and basic electronics. The arduino’s USB connector is used for serial shell functionality, where using commands it is possible to consult statistics about the system, get debugging data, but more importantly map key Ids to key strokes. The other USB connector is the actual keyboard.

The base schematic
The base schematic

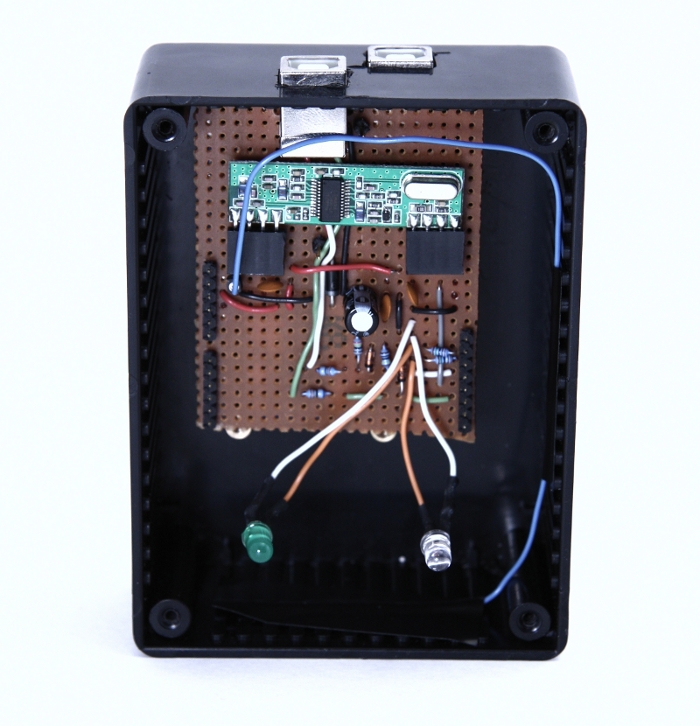
Since I had an arduino to spare, I decided to implement the USB and wireless interfaces as a shield rather than build a specific circuit. Really, the only hurdle was the weird spacing between pin 7 and 8 (why?), but that got solved by soldering angled headers to the side of the perfboard at an offset with the holes they would normally fit in. The wireless receiver was a breeze to connect but the USB interface was slightly more complex, with a couple of zener diodes and resistors to get the correct line levels.

Two versions of the base were created but they only differ in the way they look.

Remote

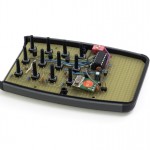
The base is mostly software but the remote is mostly electronics. The code is essentially a loop that intercepts keypad presses and sends them out through the transmitter to the base. Since it’s battery powered, the complexity of the firmware lays essentially in the power management code as the electronics cannot be left on running at full power all the time.

Remote prototype schematic

I built two different versions of the remote. The prototype which used another ATMega328P (same MCU as the arduino) featured an off-the-shelf keypad and a USB connector with a MAX 1555 for charging. The MCU is left in its deepest sleep mode all the time and is only waken up when a key press occurs. As a result, power consumption is in the order of nano amperes which yields a battery life of a couple months under normal usage when hooked up to a 900 mAh LiPo battery.

Remote version 2 schematic

The second version goes even further into increasing battery life. The ATMega328P, overkill for this application, is replaced with an ATTiny84 and the keypad interface is hooked up a circuit that turns on the micro controller and the transmitter from a fully off state only when a key is pressed. It’s using the same battery as the prototype but the power usage is so minute that after close to two years I have not yet exhausted the battery and measuring the drain is beyond my multimeter’s range. Granted, usage has been on and off due to me leaving for extended periods of time but still, that’s a pretty decent statisctic. So much so that I had plans to convert it to a solar cell and supercapacitor design but sadly, all my prototyping efforts led to failure.

The result

It was quickly put together and yielded a result of fairly high quality and convenience for the effort. I’m not saying there is no room for improvement, but it was refreshing to do a project that was not plagued by unforeseen complexity and feature creep. I’ve been using both remotes for the past two years and have been getting months of battery life for the prototype and for its successor, well, it’s still running after two years. Range wise, I can send commands at a distance of about 10 meters through several walls so it more than sufficient.

Since I have no plans to revisit the project in the near future, I’m publishing the source code and the schematics (made with gEDA) up for download on a GNU GPL license. Take note that some of the third-party libraries use a different license which is specified in their respective folders. Should you have any questions, do not hesitate to reach me through the comments or the contact page.

How to fix (fsck) a root file system that you have to boot into on Linux

Two days ago I corrupted my file system during a failed resume from standby on Fedora 19. This feature has never quite worked correctly and randomly makes the kernel panic. Usually, I hard reboot my laptop and everything is fine but that time, something went wrong and when it came back up:

systemd-fsck[605]: /dev/sda2: UNEXPECTED INCONSISTENCY; RUN fsck MANUALLY.
systemd-fsck[605]: (i.e., without -a or -p options)
[ 13.652068] systemd-fsck[605]: fsck failed with error code 4.
Welcome to emergency mode. Use "systemctl default" or ^D to activate default
mode.
Give root password for maintenance
(or type Control-D to continue):

In this case /dev/sda2 is my root partition and since it was mounted even in maintenance mode, attempting to run fsck on it would output:

fsck.ext4 /dev/sda2
e2fsck 1.42.7 (21-Jan-2013)
/dev/sda2 is mounted.
e2fsck: Cannot continue, aborting.

Which makes sense as common knowledge tells us that running fsck on a mounted file system will most likely do more damage to it.

The best option

Your best option is simply to boot into another Linux, be it on a different partition, a USB drive or a CD and run fsck manually on the faulty partition, which can easily be unmounted if necessary because no OS is using it. Easy. Normally yes, but my stupid Macbook Pro 2008 cannot boot though USB into anything else other than Mac OS X, my cd drive has been dead for years and recently, I got rid of my OS X partition. To make things more complicated, I’m in Thailand at the moment and obviously not able to take apart my computer to grab the hard drive and stick into a working system.

The other option (if you cannot boot into another Linux)

In order to assess the damage, I ran fsck in dry-run mode and piped the output to more to make reading more practical:

fsck.ext4 -n /dev/sda2 | more

From there, I could ensure that no critical files had been damaged and while keeping in mind that it’s always a gamble to use a corrupted file system, I proceeded to boot into the system to make some backups. That out of the way, I did some research on the web on how to fix a root file system that I had to boot into and sadly, not many things turned up for its not an ideal solution. Forcing the system to do it a boot time by creating a file named forcefsck and writing y in it (echo y > /forcefsck) at root no longer works and adding fsck.mode=force on the kernel command line did not fix the problem as fsck will not fix errors on its own without authorization, ie: someone to enter yes on the keyboard. Tried a few other tricks but none worked. I had no choice but keep my fingers crossed and use the system as is.

A few days later, I decided to get back to the issue and while researching alternative solutions, I read that it was possible to fix errors on a read-only file system, which it turns out can also be used to boot into. And it worked, so for posterity here is the technique:

  1. Put your root partition into read-only mode by modifying the faulty partition’s line on /etc/fstab (but remember your old settings):
    UUID=fd1d0fad-3a4c-457f-9b5e-eed021cce3d1 /                       ext4    remount,ro        1 1

    Note: If you’re already in maintenance mode at this point, you may be able to remount your file system in read only mode by running “mount -o remount,ro /” and skipping the reboot (thanks Jay).

  2. Reboot
  3. Switch to runlevel 1 just to minimize the amount of interfering processes (skip this step if you are running the session over SSH [thanks Josh]):
    init 1
  4. Fix your file system (replace /dev/sda2 with your partition’s device), which should now work because the root partition is in read only:
    fsck /dev/sda2
  5. Reboot
  6. Make your root file system readable/writable:
    mount -o remount,rw /dev/sda2
  7. Restore your /etc/fstab to its original state.
  8. Reboot

Voilà, your system is safe to use again. Hopefully this will have gotten you out of a sticky situation like it did for me. If errors keep coming up, it’s probably a sign that your hard-drive is failing and before you loose it completely, you should mirror your data to a new one.

Case against proprietary software on government systems

This has been sitting as a draft for more than two years now so I figured I should publish it.

The modern government is an information processing entity where public servants and software collaborate to serve the people. If you take away any of those two components, governments cease to operates. So it is crucial that government maintains control over its processes to shield itself from interference by outside interests; it is at the basis of sovereignty and part of what makes its area of jurisdiction a country.

You wouldn’t hire foreigners as public servants, so why would you trust your software to outside interests?

Software was introduced into governments by individuals who had no idea of what software was in the first place. It was and is still purchased, managed and used like off the shelf physical goods, but it was already too late when people figured out that replacing a vehicle fleet is a lot less work than migrating from on operating system to another.

Nowadays, companies like Microsoft could make every developed country’s government grind to a halt very easily or severely compromise it. Take the US patriot act for instance, which lets the government request any data from companies based in the US if they deem it necessary even if that data does not belong to an american entity. Another yet even more disturbing example uncovered by Edward Snowden is Microsoft handing out the keys to its encryption systems to the NSA thus actively collaborating in their espionage projects.

The European Union is starting to come to grips with this reality and is moving towards drafting rules and regulations that will make the interaction between software corporations and governments more open and directed towards giving their citizens security and value; unless this initiative gets killed by a lobby. This has obviously positioned open-source software as a preferred choice, prompting changes such as a migration to Ubuntu by the French Gendarmerie Nationale and the creation of Trustedbird by the french department of defense and British Telecom, a more secure fork of Mozilla Thunderbird (an e-mail client) whose code they intend to contribute back to the main Thunderbird tree for everyone to benefit from.

The procurement process in its current form cannot consider open-source technologies as it depends on active bids by companies. Software developed by volunteers is systematically left out for a lack of an imperative to market itself using conventional challenges. A few consulting firms on open-source technologies are trying to turn the tide but they only advertise the tip of the iceberg when it comes to all the available open-source solutions. There has been litigation lately in Quebec following decisions from the government to award a contract to Microsoft without a call for tenders based on criteria purposely crafted to exclude other vendors. A similar conflict occurred more recently when another governmental organization decided to procure MS Office licenses using the same scheme. This begs the question of whether the procurement process is really providing the government with the best value for its dollars.

I could go on detailing how companies are consciously locking governments in their own system by not following industry standards (Internet explorer has systematically been failing the ACID test) and violating anti-trust laws but I believe the previous paragraphs have been sufficient at getting my point across. I have nothing against Microsoft, IBM, or any other software corporation, they make quality products that are most often superior to the open-source equivalent (things would be the other way around if governments took part in helping developer communities improve their software). In fact, they themselves are  increasingly embracing the open development model because they have figured out that it provides them with the best value. Individuals and private businesses are free to spend their money in whatever manner they want, but government are not. They are not profit making machines or fashion following teens; they exist to bring security and prosperity to their citizens and basing information processes on closed-source software is an hindrance towards the achievement of those goals.

The lobby is strong so it is unlikely that change will come from atop. And even down at the individual level, most are incapable of dissociating Windows from a computer as Microsoft has made it certain in concert with the rest of the industry that every new computer around will be provided with a license of that operating system for very cheap (again sparking anti-trust lawsuits), thus never giving the user a real choice. Apple is starting to grind away at Microsoft’s market share thanks to the visibility it gets from its massively popular IPods and IPhones, but at the root, this company is not a whole lot different than its main competitor and in some cases practices even worse methods of locking customers in such as with their closed platform policies.

OD3D: a software oscilloscope for 3-dimensional visualization of signals

Project

OD3D stands for the french « Oscilloscope Digital 3 Dimensions » which means Digital 3D Oscilloscope. It was me and my partner’s 4th year university project. Simply put, it’s a completely functional computer based oscilloscope that works on three axes instead of two. This permits more complex visualization of waveforms, especially in the historical mode, where you can see what the signal looked like many samples ago. Any way, If you want to better understand what it does more than a classical oscilloscope, I urge you to look at the video above and the screenshots below.

It was developed under the course of a year mostly during our free time. Even if it did not ranked very well compared to other projects (try to match the bling factor of a motion-sensing automated gun-turret …), we had plans to continue its development until life took us somewhere else (and made us switch to Unix based OSes). Sadly, it sat on our hard drives for more than four years before we decided that it would be a shame to let so much work rot to obsolescence so we decided to release the whole source under a Creative Commons Attribution 3.0 license so someone can hopefully use it in another project or draw inspiration from it.

The goal of this project was to offer greater possibilities in signal visualization, build a complete, powerful and versatile software oscilloscope suite and more generally explore something new. Someone told us it could have interesting applications in conjunction with sonars (3D waterfall display) and we almost go it to act as a semiconductor curve tracer (Id vs Vds vs Vgs).

Short architectural descriptions

The whole project is actually made of two programs, the oscilloscope itself and the generic 3D engine.

We did not get as far as commenting the whole thing. In fact, there are almost no comments at all in the code but if you actually follow the logic and understand the pipeline architecture, you should have no problem figuring out how the oscilloscope part of it works. As for the 3D engine, I suggest you start with checking the demo that comes with it. Furthermore, it is not completely debugged, so you should expect it to crash pretty often.

 Oscilloscope

During the actual implementation of the oscilloscope, we tried to abstract things as much as possible in order to make the project extensible. For now, it can only use sound cards or a virtual signal generator as an input, but it would not be too hard to use a USB device (another thing we were working on) or some other custom solution. This also holds true for all the modules that sit in between the source input driver and the actual display (trigger and resolution filter), where the architecture enables you to easily build and integrate one of your own (like a spectrum analyzer or a data logger). The whole thing becomes an oscilloscope when you order and connect those modules in a specific manner: Input->Trigger->Display.

Many Inputs can connect to the same display or many displays can be connected to the same input. There are no limits on the number of channels or displays; you can go as far as your hardware resources will permit you. Back in 2008 when we presented it, we ran it on an Athlon 800 with 256MB of RAM and a GF2 MX400 to show that it was not very taxing on resources. If you want more technical information, go take a look at the specificities section.

3D engine

The 3D engine (named Motr3D) was developed as a standalone solution as opposed to being totally integrated in the oscilloscope, this means that it can be used for other stuff, like in the demo that comes in its executable folders, where we recreated a the solar system. As opposed to the oscilloscope, which is pretty functional, the 3D engine is very primitive and will not get you beyond displaying and moving polygons and basic shapes around. From the start, it was programmed to be as abstract from graphics API as possible (it uses Direct3D but it could be implemented with OpenGL), be fully object oriented and have a runtime architecture like a tree, where every 3D object (even the camera) is part of a tree and inherits from a common type. Even if the project consisted of an oscilloscope, the 3D engine is the part we are most proud of because it was both very challenging (80% of the programming time) and by far the most fun we had programming something. If you want more technical information, scroll down to the specificities section.

Specificities

Oscilloscope

  • Supports as many channels as your hardware will permit.
  • Supports as many displays as your hardware will permit.
  • Abstracted pipeline architecture for modularity.
  • Can work with any type of input, but only sound cards or a virtual signal generator are implemented.
  • Programmed in C# for the Microsoft .NET framework 2.0.
  • Has been tested on Windows 2000/XP/Vista.

3D engine

  • Fully object oriented in architecture.
  • Supports many primitives (cube, line, spheres, etc.)
  • Programmed in C# for the Microsoft .NET framework 2.0.
  • Works with Direct3D (managed) but can be made to work with OpenGL.
  • Has been tested on Windows 2000/XP/Vista.

Source: OD3D.zip

Creative Commons License
This work is licensed under a Creative Commons Attribution-ShareAlike 3.0 Unported License.

Screenshots